在部分业务中存在数据量大的情况适用mysql关联查询会慢,通过使用elasticsearch索引库来支撑查询服务,接下来讲解如何使用
下载安装程序
下载地址logstash
安装logstash
安装jdk
如启动提示没有jvm环境则需要安装,此处略。
安装logstash
unzip logstash-7.9.3.zip
配置文件
# Sample Logstash configuration for creating a simple
# Beats -> Logstash -> Elasticsearch pipeline.

input {
  # filebeat
  beats {
    port => 5044
  }
  jdbc {
	type => "t_b_culres_cul_mv"
	jdbc_driver_library => "/opt/work_shanxi_blue/logstash-6.8.6/lib/mysql-connector-java-8.0.22.jar" # MySQL JDBC驱动库的路径
	jdbc_driver_class => "com.mysql.jdbc.Driver"
	jdbc_connection_string => "jdbc:mysql://127.0.0.1:53306/shanxi_ww" # MySQL数据库的连接字符串
	jdbc_user => "wwzy" # MySQL数据库的用户名
	jdbc_password => "123456" # MySQL数据库的密码
	statement => "SELECT * FROM t_b_culres_cul_mv300" # 查询语句 WHERE created_at > :sql_last_value
	#schedule => "*/5 * * * *" # 定时执行的时间间隔,这里设置为每分钟执行一次
	#use_column_value => true
	#tracking_column => "created_at" # 用于增量同步的字段
	#tracking_column_type => "timestamp"
  }
  jdbc {
	type => "t_b_culres_gs_first"
	jdbc_driver_library => "/opt/work_shanxi_blue/logstash-6.8.6/lib/mysql-connector-java-8.0.22.jar" # MySQL JDBC驱动库的路径
	jdbc_driver_class => "com.mysql.jdbc.Driver"
	jdbc_connection_string => "jdbc:mysql://127.0.0.1:53306/shanxi_ww" # MySQL数据库的连接字符串
	jdbc_user => "wwzy" # MySQL数据库的用户名
	jdbc_password => "123456" # MySQL数据库的密码
	statement => "SELECT * FROM t_b_culres_gs_first300" # 查询语句 WHERE created_at > :sql_last_value
	#schedule => "*/5 * * * *" # 定时执行的时间间隔,这里设置为每分钟执行一次
	#use_column_value => true
	#tracking_column => "created_at" # 用于增量同步的字段
	#tracking_column_type => "timestamp"
  }
}

filter {
  mutate {
    remove_field => ["@version", "@timestamp"] # 移除Logstash自动生成的字段
  }
}
output {
	if [type] == "t_b_culres_cul_mv" {
		elasticsearch {
			hosts => ["http://127.0.0.1:9200"]
			# 索引名称
			index => "t_b_culres_cul_mv"
			user => "elastic"
			password => "cosmosource"
			document_id => "%{id}"
		}
		stdout {
			codec => json_lines
		}
	}
	if [type] == "t_b_culres_gs_first" {
		elasticsearch {
			hosts => ["http://127.0.0.1:9200"]
			# 索引名称
			index => "t_b_culres_gs_first"
			user => "elastic"
			password => "cosmosource"
			document_id => "%{id}"
		}
		stdout {
			codec => json_lines
		}
	}
}
启动logstash
nohup ./bin/logstash -f ./config/logstash.conf >./text.txt 2>&1
查看进程
ps aux|grep logstash
杀死进程
kill -9 123
查看tomcat的输入日志信息
tail -f text.txt
常见问题
Logstash启动报错:401的问题解决
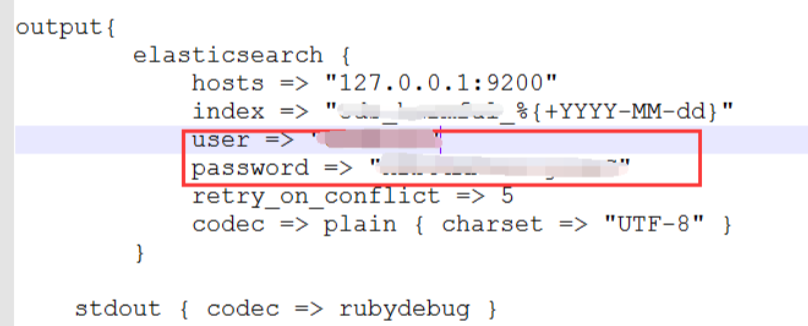
原因: logstash的conf文件没有配置ES的账号密码, 配置上账号密码即可

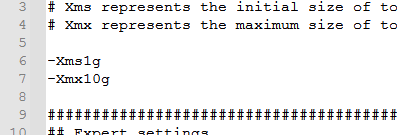
修改内存大小
/opt/work_shanxi_blue/logstash-6.8.6/config/jvm.options

ES错误:retrying failed action with response code: 503 ({"type"=>"unavailable_shards_exception"
[2019-04-03T09:54:15,328][INFO ][logstash.outputs.elasticsearch] retrying failed action with response code: 503 ({"type"=>"unavailable_shards_exception", "reason"=>"[gps_lte-mode-2019.04.03][1] primary shard is not active Timeout: [1m], request: [BulkShardRequest [[gps_lte-mode-2019.04.03][1]] containing [8] requests]"})
[2019-04-03T09:54:15,328][INFO ][logstash.outputs.elasticsearch] Retrying individual bulk actions that failed or were rejected by the previous bulk request. {:count=>25}[root@netmgmt-prod-elk-03 ~]# curl '10.7.1.8:9200/_cluster/health?pretty'
{
"cluster_name" : "es-e679l179",
"status" : "red",
"timed_out" : false,
"number_of_nodes" : 6,
"number_of_data_nodes" : 3,
"active_primary_shards" : 5831,
"active_shards" : 11422,
"relocating_shards" : 0,
"initializing_shards" : 0,
"unassigned_shards" : 250,
"delayed_unassigned_shards" : 0,
"number_of_pending_tasks" : 0,
"number_of_in_flight_fetch" : 0,
"task_max_waiting_in_queue_millis" : 0,
"active_shards_percent_as_number" : 97.8581220013708
}[root@netmgmt-prod-elk-03 ~]# curl http://'10.7.1.8:9200/_cat/indices' | grep red % Total % Received % Xferd Average Speed Time Time Time Current Dload Upload Total Spent Left Speed 1 144k 1 2704 0 0 907 0 0:02:43 0:00:02 0:02:41 907 red open gps_lte-mode-2019.04.03 _N2IkwVeSxiP4s1gMyFQgw 5 1
curl -XDELETE 'http://127.0.0.1:9007/gps_lte-mode-2019.04.03'
curl -XGET 'http://localhost:9007/t_b_culres_gs_first/_doc/000011e4ad18414e9b0eea7f230610d7'
本文由 admin 创作,采用 知识共享署名4.0
国际许可协议进行许可
本站文章除注明转载/出处外,均为本站原创或翻译,转载前请务必署名
最后编辑时间为:2023-12-06 14:05:02

